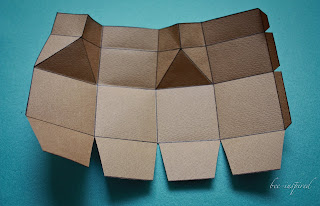
bee-inspired.blogspot.com has a really great gift boxes tutorial and bejeweleddesignsbychelsea.blogspot.com took the tutorial and made it green. Bejeweleddesignsbychelse uses cereal boxes with template printed on your computer and assembled by you. They are very cute looking.
For the past few weeks I've been constantly reminded of how I need to throw out the mindset of "I just need this/that before I can do my project", and rather just use what I have. One of my big problems is that I make something as a gift and then usually can't find appropriate packaging. So I've decided to start making my own. It works out WAY cheaper and if I keep it simple it only takes 10min. Here is a basic tutorial so that you can make your own too.
First choose and download a free template from Mirkwood designs for the type of box that suites your need then follow the tutorial. If you want a bigger box than the template, you can re-size it on the computer or with a photocopy machine.
The tutorial below is for 'milk box' packaging, template here, but the same technique applies to all the different box shapes. (I used this one to package cookies)
Print straight onto cardboard or trace the template like I did, because the cardboard I had was too big. (Make marks on the sides so that you know where to rule the lines for the folds)
Cut it out and with the back of your scissors trace along all the lines that need to be folded. This just helps to get precise folds.
Now fold along all the lines And cut slits/darts between each of the tabs that you will be sticking together (you can see this on the bottom and right of the picture)
Stick double sided tape to each of the tabs (making sure that the double sided tape is on the right side:) On the second tab at the bottom you can see that I stuck my tape in the wrong place and had to adjust it - don't be as silly as I was - although no-one will see it in the end.
Now fold your box and stick it together. Then add a piece of double sided tape so that you can close your box AFTER you have placed your gift inside the box.
And then do any finishing touches that you need - I usually add some or other stamped design and sometimes a ribbon.
TA DA!!
I usually use the milk box for sweets or cookies. You can easily make it longer by just adding a few cm to the length when you trace it.
Or I make puffy boxes, template here, for small gifts that I sew.
Another idea for eco-gift packaging is using vintage fabric and Furoshiki Japanese Folding technique found on this YouTube Video:
Here is an example of one my Furoshiki gift bags (using a vintage handkerchief) in process:


2 comments:
Excellent gift boxes. I like this design.
Gift Bags and Boxes
Hello,
Thanks for giving me such type of useful information about Green & Bio Gifts. Now a days it has became a wonderful resource of plastic cards.
Post a Comment